Converting a Website to an Android App in Android Studio: A step-by-step guide.
hello and welcome guys, in this post I gonna show you how to convert your website into an Android application
using Android Studio.
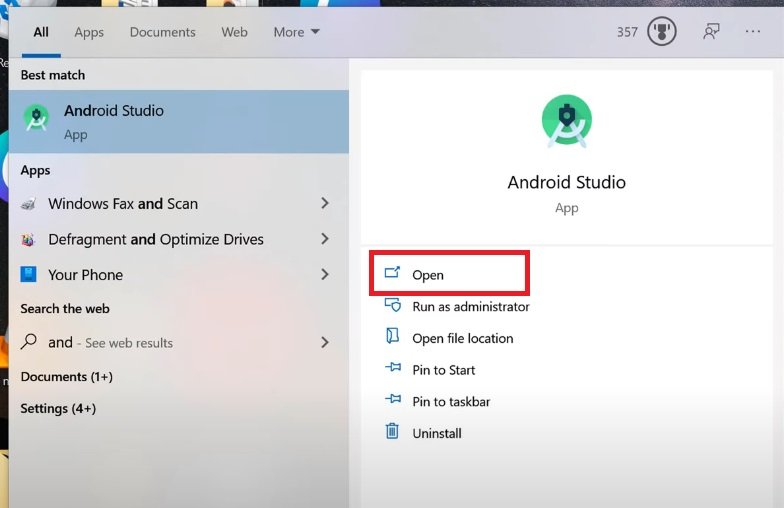
so friends first open Android Studio click on start and open.
now click on the file then new and click on a new project in here select an empty activity
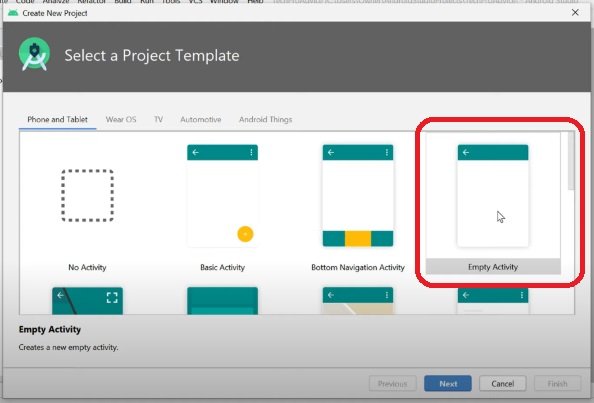
then click on next now type your application name.
select the language as Java.
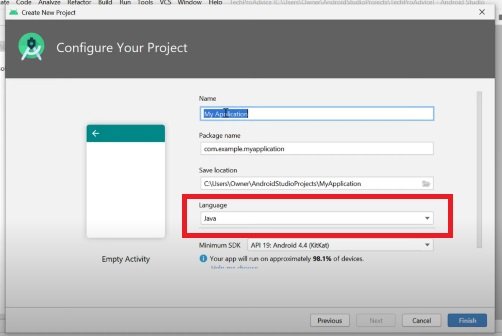
then click on finish now wait for a while till the processor is complete.
and friends you need to visit this website page techkara.com i will provide all the code that you want to
use in your Android application.
so visit this page techkara.com now you will see this interface maximized. now the first thing you have to do here is to the same
files and folders so click on app then manifests and click on android manifest.xml
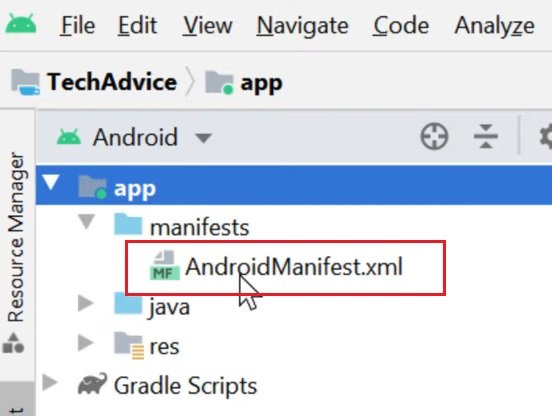
so double-click on it and here you will find this option package.
so actually this third line press enter and visit my site and copy this first code it’s a user permission code to copy
and paste here now click on activity main dot xml.
now here you see the default interface. click on the code.
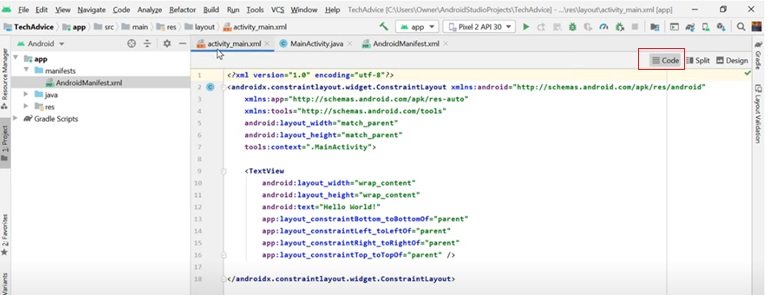
and you can find it in some Android versions’ left bottom corner so any way click on the code settings.
we are now activity_main.XML
now remove this code from the text view till here.
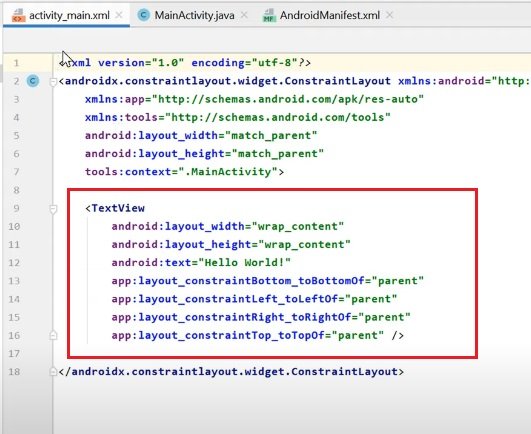
now friends you need to remove this text androidx.constraintlayout.widget.constraint and only just keep the layout and before layout type relative.

layout layout so remove this code and type relative so as we can see. now On both sides, we have the relative layout.
and after that click on design so you will see this interface now click on this search icon and type web
so you will find this webview drag and drop here now again visit my site
and copy this second code now again click on code so you will see web view
Press enter and paste that code now click on this res folder so expand now expand values and double click on styles
here you need to change dark into no so select dark test remove it and type no and capital now click on main activity java
now click on these three dots now enter underneath the bundle.
now visit my site copy these three codes and pass them underneath the bundle
so as you can see this is the third line.
now again visit my site copy this third code and paste it underneath the public class
so it’s actually line number 10 app compact activity so enter here and paste this one
now again visit and copy this phi code line and paste the activity menu so click here again visit site
now copy this code
now enter after this symbol
so as we can see our cursor is between
this
both symbol
and paste here
now we will find some error
so
you need to press alter
key plus enter
so that error will be gone
so friends you need to
import class so sometimes
this error will be gone by pressing
alt key plus enter and sometimes you
will
over your cursor here so underneath you
will find the option
import class, so just you need to click
on that import class
okay
now
last thing you have to do
you load your
website URL
in here so remove it from here
this double quote
till this double quote remove that one
and paste your website URL
and after that
click on build
then click on generate a signed bundle
now select apk
click on next
now click on Create new
key store path so now save it on your pc
path of this apk
if you will click on this folder icon
so it will shows all directories so select
where do you want to save
in my case, i want to save in
d drive
so give the name for that application
then click on ok
now enter the password
again enter the password you can enter
the same
password now validity
there is a 25 you can increase if you
like
now enter
first name and last name for the certificate
for this application
now enter organization and city-state
and
country code
then click on ok
now check this box to remember your password if
you like
and after that click on next
now select release
check both boxes
and click on finish
now as we can see generated signed apk
successfully
now click here
and click on locate
now your
application apk is ready right click on
it
click on rename
type apk name
now friends you need to add icon for
application
so click on rest
right click on drawable
move your cursor to new
then click on image assist
now select image
as type of icon
now add icon from your pc
so you need to make ready an icon
500 by 500
i have the icon in my d drive
this one
so select it and click on ok
now
you can adjust your icon
like by resizing
if it will okay here in google play
store
so it will be okay for
every platform
after that click on next
then click on finish
now again click on build
generate signed bundle apk
select apk
next
next
release
check box box and click on finish
so as we can see now our
application is ready
click on locate
this first one so again
change the name
if you want to test this application so
click on this
run icon
so as we can see now our application is
ready
if you want to install it on your
mobile
so there is a very simple and easy method
firstly look out that apk
like in my case i have my apk in here
so copy it
and paste on your desktop
now download on the drive
now open that apk on your mobile device
so I will open my drive
this one
and we have this tech advice apk just
now we created
click on install
click on Install anyway
click on open
that’s it
so friends
I hope you like this post With this easy and very simple method you can convert your website into an application
using Android Studio.
hopefully like this post, thanks for reading this post please subscribe to this channel for the latest update.
